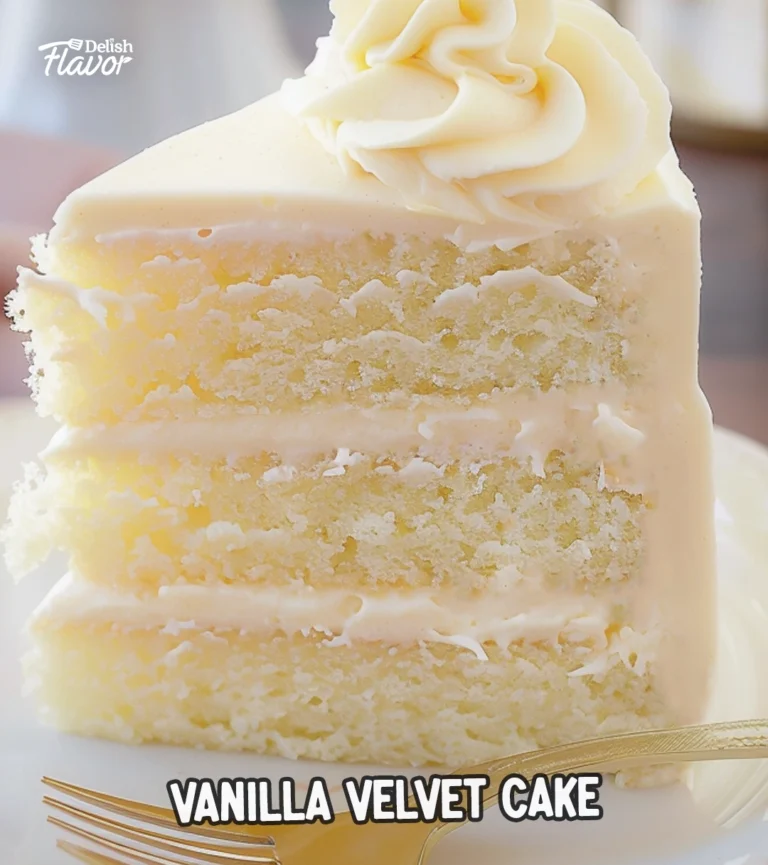
What is Vanilla Velvet Cake?
Vanilla Velvet Cake is the epitome of elegance in the dessert world. Its velvety texture and rich vanilla flavor make it a favorite for all occasions, from birthdays to weddings. Unlike its popular cousin, the Red Velvet Cake, this version focuses on the pure, delightful essence of vanilla, offering a luxurious yet simple treat.
The Popularity of Velvet Cakes
Velvet cakes have always held a special place in the hearts of dessert lovers. Known for their smooth, tender crumb and rich flavor, these cakes have evolved from the classic Red Velvet to include a variety of flavors, with Vanilla Velvet being one of the most beloved.
Why Choose Vanilla Velvet Cake?
Why go for Vanilla Velvet Cake? It’s versatile, easy to pair with various frostings, and universally adored. Whether you’re a fan of subtle flavors or prefer something more decadent, this cake offers the perfect balance of sweetness and texture, making it a must-try for any dessert enthusiast.
The History of Velvet Cakes
Origins of Velvet Cake
The Velvet Cake dates back to the Victorian era, where it was prized for its smooth, “velvety” crumb. Initially, the cake was known for its delicate texture rather than its flavor. Over time, bakers began experimenting with different ingredients, leading to the creation of various velvet cakes.
Transition to Different Flavors
While Red Velvet is perhaps the most famous, other flavors like chocolate, lemon, and vanilla have become popular. Each variation retains the cake’s signature texture while introducing a unique twist on the classic recipe.
Introduction of Vanilla as a Velvet Cake Flavor
Vanilla, with its universally appealing flavor, naturally found its way into the velvet cake family. The result is a cake that’s both simple and sophisticated, offering a new take on the traditional velvet texture.
Ingredients Needed for Vanilla Velvet Cake
Basic Ingredients
To create the perfect Vanilla Velvet Cake, you’ll need the following ingredients:
- All-purpose flour
- Granulated sugar
- Eggs
- Unsalted butter
- Buttermilk
- Baking soda
- Vinegar
- High-quality vanilla extract
The Secret to a Perfectly Moist Cake
The key to a moist velvet cake lies in the balance of ingredients. Buttermilk adds richness, while the combination of vinegar and baking soda creates a light, airy texture. Using room-temperature ingredients ensures even mixing and a better crumb.
Importance of Quality Vanilla Extract
Vanilla is the star of this cake, so it’s essential to use the best quality vanilla extract you can find. Pure vanilla extract offers a depth of flavor that artificial versions simply can’t match.
The Science Behind the Velvet Texture
Role of Buttermilk in Velvet Cakes
Buttermilk is a crucial component in velvet cakes. Its acidity helps tenderize the gluten in the flour, resulting in a soft, velvety crumb. Additionally, it adds a slight tanginess that complements the sweetness of the cake.
The Impact of Vinegar and Baking Soda
The reaction between vinegar and baking soda is what gives velvet cakes their distinctive texture. This chemical reaction creates bubbles of carbon dioxide, which help the cake rise and achieve its light, airy structure.
How to Achieve the Perfect Crumb
To achieve that signature velvet crumb, it’s essential to mix the batter just right. Overmixing can lead to a dense cake, while undermixing can result in an uneven texture. The goal is to combine the ingredients until they’re just incorporated, creating a smooth, lump-free batter.
Step-by-Step Guide to Making Vanilla Velvet Cake
Preparing the Ingredients
Start by gathering all your ingredients and ensuring they’re at room temperature. Preheat your oven to the required temperature and prepare your baking pans by greasing them and lining them with parchment paper.
Mixing the Batter
In a large mixing bowl, cream together the butter and sugar until light and fluffy. Add the eggs one at a time, beating well after each addition. Next, mix in the vanilla extract.
In a separate bowl, whisk together the dry ingredients. Gradually add the dry ingredients to the wet mixture, alternating with the buttermilk. Stir until just combined.
Baking the Cake
Pour the batter into your prepared pans, spreading it evenly. Bake in the preheated oven for the specified time, or until a toothpick inserted into the center comes out clean.
Cooling and Layering
Once baked, allow the cakes to cool in the pans for a few minutes before transferring them to a wire rack to cool completely. Once cool, you can layer the cakes with your choice of frosting.
Frosting Ideas for Vanilla Velvet Cake
Classic Cream Cheese Frosting
A traditional choice, cream cheese frosting pairs beautifully with the subtle vanilla flavor of the cake. Its tangy sweetness adds a delightful contrast to the rich, velvety crumb.
Vanilla Buttercream Frosting
For a more straightforward option, vanilla buttercream is always a winner. It’s smooth, creamy, and enhances the vanilla flavor of the cake without overpowering it.
Unique Frosting Variations
Feeling adventurous? Try a white chocolate ganache, lemon curd, or even a lavender-infused frosting to add a unique twist to your Vanilla Velvet Cake.
Decorating Tips for Vanilla Velvet Cake
Simple and Elegant Decorations
Sometimes, less is more. A simple dusting of powdered sugar, a few fresh berries, or a light drizzle of glaze can add a touch of elegance without overwhelming the cake’s flavor.
Adding Fresh Fruits and Edible Flowers
For a more vibrant presentation, consider decorating your cake with fresh fruits like strawberries or raspberries. Edible flowers, such as pansies or violets, can add a whimsical touch that’s perfect for spring or summer gatherings.
Creative Ideas for Special Occasions
If you’re baking for a special event, consider customizing your cake’s decoration to fit the theme. Use colored fondant, edible glitter, or personalized cake toppers to make your Vanilla Velvet Cake the centerpiece of the celebration.
Common Mistakes to Avoid
Overmixing the Batter
Overmixing can lead to a dense, tough cake. Be sure to mix just until the ingredients are combined, and avoid the temptation to overwork the batter.
Baking at Incorrect Temperatures
Baking at the wrong temperature can cause the cake to rise unevenly or become too dry. Always double-check your oven’s temperature and use an oven thermometer if needed.
Choosing the Wrong Frosting
Not all frostings are created equal. Be sure to choose a frosting that complements the cake’s flavor and texture. A heavy frosting can overpower the delicate vanilla taste, so opt for something light and airy.
Serving Suggestions
Pairing with Beverages
Vanilla Velvet Cake pairs well with a variety of beverages. Coffee, tea, or a glass of cold milk are classic choices. For a more sophisticated pairing, consider serving with a glass of dessert wine or champagne.
Best Occasions to Serve Vanilla Velvet Cake
This cake is versatile enough to be served at almost any event. Birthdays, weddings, anniversaries, or even casual get-togethers are all perfect occasions for a slice of Vanilla Velvet Cake.
Presentation Tips
Presentation matters, especially when serving at a special event. Consider serving the cake on a beautiful cake stand, and add garnishes like fresh berries, mint leaves, or a drizzle of chocolate sauce for an extra touch of elegance.
Healthier Alternatives
Gluten-Free Vanilla Velvet Cake
For those with gluten sensitivities, a gluten-free version of Vanilla Velvet Cake is a great option. Substitute regular flour with a gluten-free blend, and ensure all other ingredients are certified gluten-free.
Reducing Sugar and Fat Content
To make a lighter version of this cake, consider reducing the sugar or replacing some of the butter with applesauce. This will result in a cake that’s just as moist but with fewer calories.
Vegan Vanilla Velvet Cake Options
For a vegan alternative, replace the eggs with flax eggs and use a plant-based butter and milk. The result is a delicious, cruelty-free cake that everyone can enjoy.
Why Vanilla Velvet Cake is a Crowd-Pleaser
Versatility in Flavors and Decorations
Vanilla Velvet Cake’s neutral flavor makes it a blank canvas for various decorations and flavor pairings. Whether you keep it simple or dress it up, this cake is sure to please any crowd.
Appeal to Different Age Groups
From children to adults, everyone loves Vanilla Velvet Cake. Its classic flavor and soft texture make it a hit at any gathering.
Perfect for All Celebrations
No matter the occasion, Vanilla Velvet Cake fits the bill. Its timeless appeal and elegant presentation make it a favorite for all types of celebrations.
Storing Vanilla Velvet Cake
Proper Storage Techniques
To keep your cake fresh, store it in an airtight container at room temperature for up to three days. If your kitchen is particularly warm, consider refrigerating the cake, but allow it to come to room temperature before serving.
Freezing and Reheating Tips
Vanilla Velvet Cake freezes well. Wrap individual slices or the entire cake in plastic wrap, followed by aluminum foil, and store in the freezer for up to three months. To reheat, thaw the cake at room temperature and warm slices in the microwave for a few seconds before serving.
How Long Does it Last?
When stored properly, Vanilla Velvet Cake can last up to five days at room temperature or longer if refrigerated or frozen. However, it’s best enjoyed fresh to appreciate its full flavor and texture.
Conclusion
Baking a Vanilla Velvet Cake is more than just creating a dessert—it’s crafting a timeless piece of culinary art. Whether you’re a novice baker or a seasoned pro, this cake is sure to impress. Its delicate crumb, rich vanilla flavor, and endless decorating possibilities make it a favorite for any occasion. So why not give it a try? You might just discover your new go-to cake recipe.
Vanilla Velvet Cake
- Prep Time: 20
- Cook Time: 30
- Total Time: 50 minutes
Ingredients
For the Cake:
– 8 oz (226g) cream cheese, softened
– 1 ½ sticks (168g) unsalted butter, softened (¾ cup)
– 2 cups (400g) sugar
– 4 large eggs, room temperature
– 3 cups (342g) cake flour (see notes for substitution)
– 2 teaspoons (8g) baking powder
– ½ teaspoon (3g) baking soda
– ½ teaspoon (3g) salt
– 1 cup (242g) buttermilk (see notes for substitution)
– ¼ cup (54g) vegetable oil (e.g., canola oil)
– 1 tablespoon (12g) vanilla extract
For the Vanilla Buttercream:
– 3 sticks (339g) unsalted butter, softened
– 7 cups (690-805g) powdered sugar (adjust for desired consistency)
– 2 teaspoons (8g) vanilla extract (use clear imitation vanilla for whiter frosting)
– ⅓ cup (72g) whole milk or cream (more if needed)
– ½ teaspoon (3g) salt
Instructions
For the Cake:
1. Preheat the Oven:
– Preheat the oven to 325°F (165°C). Grease and flour three 8-inch cake pans, and line the bottoms with parchment paper.
2. Mix Dry Ingredients:
– In a medium bowl, whisk together the cake flour, baking powder, baking soda, and salt. Set aside.
3. Mix Wet Ingredients:
– In another bowl, combine the buttermilk, vegetable oil, and vanilla extract. Set aside.
4. Make the Batter:
– In a stand mixer, beat the softened butter and cream cheese until smooth.
– Gradually add the sugar and mix on medium speed for 2-3 minutes.
– Add the eggs one at a time, mixing until the yolk disappears after each addition.
– On low speed, alternate adding the dry ingredients and the wet ingredients, beginning and ending with the dry ingredients (3 additions of dry, 2 of wet). Mix just until combined—do not overmix.
5. Bake the Cakes:
– Divide the batter evenly between the prepared pans.
– Bake for 25-28 minutes, or until a toothpick inserted into the center comes out clean or with a few crumbs.
– Let the cakes cool in the pans for 5-10 minutes, then turn them out onto a wire rack to cool completely.
For the Vanilla Buttercream:
1. Cream the Butter:
– Beat the softened butter until smooth. Add the vanilla extract and mix until combined.
2. Add Sugar and Milk:
– Add half of the powdered sugar and most of the milk. Beat on medium speed until incorporated.
– Add the remaining powdered sugar and milk. Beat for 3-4 minutes, scraping the bowl as needed.
– Reduce the mixer speed to low (#2 on a KitchenAid) for 1-2 minutes to eliminate air bubbles and create a smooth texture.
3. Adjust Consistency:
– If the frosting is too thin, add more powdered sugar. If too thick, add a bit more milk.
Assembly:
1. Layer the Cake:
– Place the first cake layer on a cake plate or pedestal. Spread a layer of buttercream on top. Repeat with the remaining layers.
2. Crumb Coat:
– Fill in any gaps between the layers with buttercream and apply a thin crumb coat. Chill the cake in the freezer for 10-15 minutes (or in the refrigerator for longer) to firm up the frosting.
3. Frost and Decorate:
– Apply the final coat of frosting. Use a bench scraper or spatula to smooth the sides. Decorate as desired (e.g., piping borders or roses).
—
Notes:
– Cake Flour Substitute: For each cup of all-purpose flour, remove 2 tablespoons and replace with 2 tablespoons of cornstarch. For this recipe, use 3 cups of all-purpose flour, remove 6 tablespoons, and add 6 tablespoons of cornstarch. Whisk to blend.
– Buttermilk Substitute: Add 1 tablespoon of vinegar or lemon juice to a measuring cup, then add milk to the 1-cup mark. Stir and let sit for 5 minutes before using.
Nutrition
- Calories: 450
FAQs
Can I Make This Cake in Advance?
Yes, Vanilla Velvet Cake can be made a day or two in advance. Store it in an airtight container to keep it fresh, and frost it just before serving.
What’s the Best Type of Flour to Use?
All-purpose flour is the best choice for Vanilla Velvet Cake. It provides the right balance of protein for a tender crumb while still offering structure.
How Can I Prevent My Cake from Being Too Dense?
To prevent a dense cake, be sure not to overmix the batter and avoid overbaking. Using room-temperature ingredients also helps achieve a lighter texture.
What’s the Difference Between Vanilla Velvet Cake and Other Vanilla Cakes?
Vanilla Velvet Cake is known for its soft, velvety crumb, achieved through the use of buttermilk and the reaction between vinegar and baking soda. Other vanilla cakes may have a different texture and ingredient composition.
Can I Add Other Flavors to the Batter?
Absolutely! While the classic version is vanilla, you can add lemon zest, almond extract, or even a touch of coconut for a unique twist on the traditional recipe.