If you’re a lemon lover, get ready for a treat that tastes just like summer in every bite! This Lemonade Layer Cake is light, fluffy, and bursting with tangy lemon flavor. Each moist layer is brushed with concentrated lemonade and smothered in a creamy lemon cream cheese frosting — the perfect balance of sweet and tart. Whether you’re celebrating a special occasion or simply craving a bright, cheerful dessert, this cake will steal the show!
Why You’ll Love This Cake
This isn’t your ordinary lemon cake — it’s pure sunshine wrapped in frosting! Made with real lemonade concentrate, lemon extract, and fresh zest, it captures that nostalgic flavor of a chilled glass of lemonade. The addition of cream cheese in both the cake and frosting gives it a luxurious texture and a slightly tangy depth that’s irresistible.
How to Make Lemonade Layer Cake
Step 1: Preheat and Prepare
Start by setting your oven to 325°F (163°C). Grease and flour three 8-inch round cake pans, then line the bottoms with parchment circles. This simple step guarantees easy release and perfectly shaped layers.
Step 2: Mix the Dry Ingredients
In a medium bowl, whisk together:
- Cake flour
- Baking powder
- Baking soda
- Salt
Whisking helps distribute the leavening evenly for a light, even rise.
Step 3: Combine the Wet Ingredients
In another bowl, stir together:
- Milk
- Vegetable oil
- ½ cup thawed frozen lemonade concentrate
- Lemon extract
- Fresh lemon zest
This combination infuses the batter with bright citrus notes from the very beginning!
Step 4: Cream the Butter and Cream Cheese
In the bowl of a stand mixer, beat softened butter and cream cheese together on medium speed until smooth and fluffy. This blend adds richness and keeps the crumb incredibly tender.
Step 5: Add the Sugar and Eggs
Gradually mix in the sugar and beat for 2–3 minutes until light and airy.
Next, add the eggs one at a time, mixing just until each yolk disappears. (If you want that sunny yellow hue, add a touch of yellow gel food coloring now.)
Step 6: Combine Everything
Reduce the mixer speed to low. Alternately add the dry mixture and the wet mixture, starting and ending with dry ingredients (3 additions of dry, 2 of wet). Mix only until combined — overmixing can make the cake dense.
Step 7: Bake
Divide the batter evenly among the prepared pans. Bake for 28–30 minutes, or until a toothpick inserted into the center comes out clean or with a few moist crumbs.
Cool the cakes in the pans for 10 minutes, then transfer them to wire racks to cool completely.
💡 This recipe makes about 8 cups of batter and can also be used for cupcakes! They’ll bake flat with little to no dome — perfect for frosting.
Lemon Cream Cheese Frosting
Now for the magic that ties it all together — the frosting! It’s smooth, tangy, and lightly flavored with lemon for that classic lemonade finish.
What You’ll Need:
- Butter, softened
- Cream cheese, softened
- Lemon extract
- Vanilla extract
- A pinch of salt
- Powdered sugar
- Yellow gel coloring (optional)
How to Make It:
- Beat butter until creamy.
- Add the cream cheese and mix until fully combined and smooth.
- Blend in lemon extract, vanilla, and salt.
- Gradually add powdered sugar on low speed, then increase to medium and mix until light and fluffy.
- If the frosting is too thick, add a splash of milk or a little lemonade concentrate until you reach a spreadable consistency.
Store any extra frosting in the refrigerator. Before using, let it come to room temperature and whip again for a fluffy texture.
Assembling Your Lemonade Layer Cake
- Place the first cake layer on your serving stand or platter.
- Lightly brush the top with lemonade concentrate for an extra punch of flavor (optional but highly recommended!).
- Spread a generous layer of frosting over the top.
- Repeat with the second and third layers, brushing each with lemonade and frosting as you go.
- Apply a thin “crumb coat” around the cake to trap any stray crumbs, then chill it for 10–15 minutes to firm up.
- Add the final layer of frosting, smoothing or texturing it with a spatula.
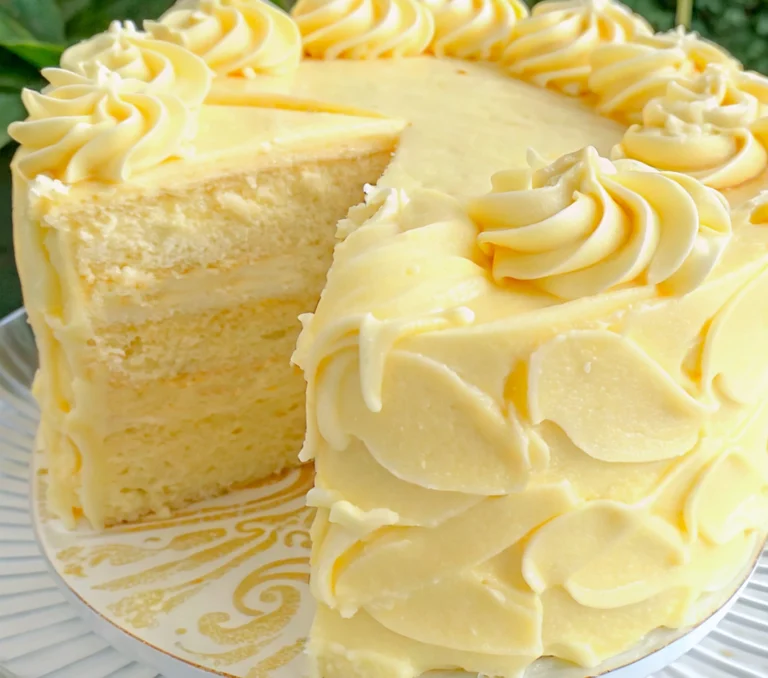
- For a finishing touch, pipe a border using a 1M star tip — it gives a charming bakery-style look!
Decorating Tips
Keep it simple with soft swirls, or go for an elegant rustic look using an offset spatula. A few lemon slices or curls of zest make a gorgeous garnish on top!